We’ve been in our home for just over a year now. Since we moved in, we’ve been tackling a lot of different home improvement projects. It’s so exciting to be able to see the transformation as we make upgrades and changes. One thing that desperately needed our attention was our outdoor patio. It’s an awesome space, but the concrete was in rough shape. Here’s our concrete patio refresh project.
Our Patio
We have this amazing screened-in patio right off of our kitchen. It’s a fairly large space and great for enjoying coffee, getting some fresh air, and hanging out. It was a major selling point for this house, besides the spacious kitchen. We weren’t sure about the ground though because it was actually covered with carpet when we bought the house. So after getting the keys, the first thing I did was roll up that carpet and toss it to the side! Underneath, I found some decent concrete. It was obvious that it would need some work though.

Not so Pretty
To my (mild) disappointment, it was not a solid concrete pad. It had been poured in different pieces that had obviously shifted over time, leaving some large gaps. The gaps were different widths and depths and seemed to just collect debris constantly. The slabs were also not level. Some of the corners were sitting higher than others, making the concrete uneven in some areas. Also, it was clear that previous owners/tenants used the space to do painting projects because there were lots of paint splatters, drips, and smears. In addition, previous children had used it as their personal drawing canvas. It was clear to me that we needed to give the concrete a bit of a face lift.

The Game Plan for our Concrete Patio Refresh
We didn’t want to redo the concrete here because we already had several other concrete projects in the works (widening the driveway, redoing concrete pathways, making additional storage space). Concrete is not cheap, even though we’re doing it ourselves! The uneven corners bothered me a bit, but not enough to do anything major. Sometimes you have to choose your battles. Instead, I opted to fill the gaps and paint the concrete. This would help freshen up the space without any extreme renovation. Since this is our first home, we’re being strategic with the major projects we take on.
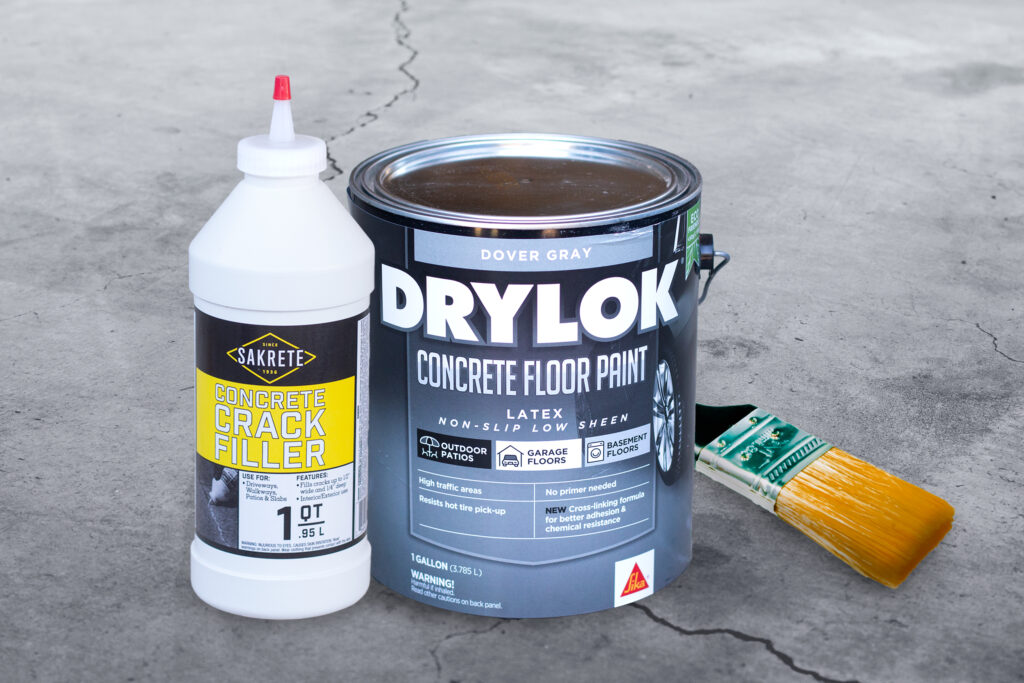
Filling the Gaps
We took everything out of the patio area, blew out the debris, and hosed it off. The first step was to fill the cracks and gaps. We found concrete crack filler, which is a lot like caulking.

Filling the gaps was a long process over multiple days. Once a layer was applied, we had to wait for the filler to settle and dry for the rest of the day. The size and depth of the gaps varied greatly. Since some of the gaps were deeper than others, the filler would sink down and then we’d have to apply more the next day.
The filler wasn’t always easy to work with either. I had to keep shaking it to avoid clogging the bottle. Also, even though it’s a self-leveling product, I found that it didn’t level enough on its own (at least to my liking), so I used my finger to level and blend the filler with the edges of the concrete.
Once it was all done though, the filler dried solid, with no flexibility or movement (which is exactly what we wanted). The filled gaps weren’t perfect by any means, but they were 10x better than before and we were satisfied with the outcome. It was finally time to move onto the next step.

Painting the Concrete
What we used:
- Concrete paint
- Paint roller with long handle
- Frog tape
- Paint brush

We taped off the base of our patio walls to avoid getting paint on them. The paint brush was used to paint the edges of the patio where the roller would have more difficulty. We also used the brush to paint the gaps where the filler was applied since they dipped a little below the concrete slabs. The roller took care of the large areas. It only took us about 20 minutes to do each coat of paint. We ended up only needing 2 coats and didn’t quite use a full gallon of paint. The one thing we could have used was a paint roller cover made for rough surfaces. They’re more fluffy rather than spongy and can get paint into textures surfaces better. We went with what we already had, which was for smoother surfaces, but it didn’t deal with the texture and natural bumps/divots of the concrete as well. It always helps to have the right supplies for the job. In the end, we still got it done and that’s what matters.

Overview of the Concrete Patio Refresh Project
We were happy to see solid color on the patio ground rather than crayon drawings and paint smears. The color of the paint is a little darker than I wanted, but there weren’t too many options when we purchased the paint. Still, it’s a major improvement and didn’t cost too much. Later on, I could decide to put down an outdoor rug to brighten up the floor. I would not put carpet down like what was there in the beginning. The space is not completely enclosed and it does get wet when it rains, so carpet does not make sense.
What’s Next
The patio refresh project is not over. This was just phase one. We plan to continue to refresh the space with new patio doors (we have two leading to the backyard), painting the walls, replacing the slider door leading from the kitchen, and replacing rotted trim around the slider. As we take on more phases of the project, I’ll share the newest updates and transformations. By the end of the project, we should have a really nice outdoor patio space and a great hang out spot!
More to Check Out
Kitchen Gadgets & Tools You Need to Have
Weekly Meal Planning: 7 Benefits
Discuss with us
Have you ever painted concrete ground? Tell us how it went in the comments! Also, tell us how you think our concrete patio refresh project turned out.
Contact: ashley@peekandponder.com
- How to Start a Garden from Seed: 10 Easy Tips for Beginners - May 28, 2025
- 20 Spring Activities for Adults - March 20, 2025
- Home Coffee Bar Essentials - March 9, 2025
Leave a Reply